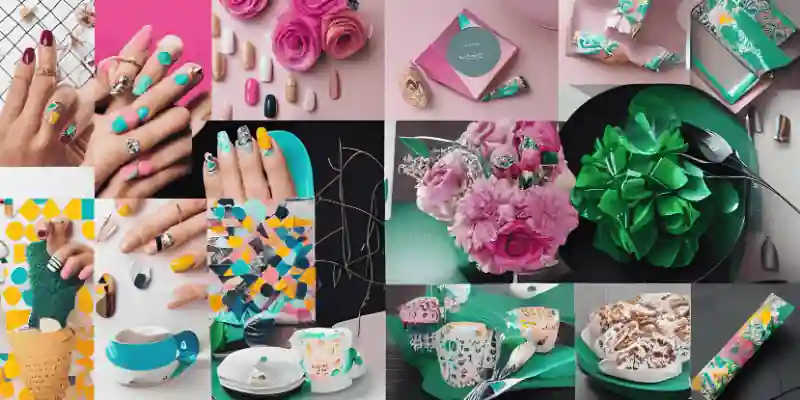
15 Easy DIY Nail Designs for Short Nails: No Tools Required [Beginner-Friendly Guide]
Updated: 28/12/2024
228
Hi there! Welcome to my blog. I know how it feels when your short nails make you think you can’t try DIY Nail Designs for Short Nails. It’s a bit frustrating.
But do not worry, I have the perfect solution! With just a few simple things you already have at home, like toothpicks and bobby pins, you can create amazing designs.
I share 15 easy and fun nail art ideas perfect for beginners like me and you. These designs make short nails look beautiful and elegant, like in a salon. So, let’s get started and turn our nails into little art pieces!
“A quality nail art brush can make all the difference in your DIY nail designs. Learn more about the best options on our Professional Nail Art Brushes page.”
Key Takeaways:
- Essential basics: I learn to prepare my nails by applying a thin base coat and a clear coat to make my manicure look neat and last longer.
- Simple techniques: try simple nail art using everyday things like toothpicks to easily make small dots and fine lines.
- Popular styles: I create trendy styles, such as modern French tips, cool geometric patterns, and pretty half-moon designs that look great on my short nails.
- Color mastery: I play with colors by mixing metallic shades, soft pastels, and two-toned designs. I also use glitter to make my nails shine.
- Professional secrets: I use expert tricks and hacks to keep my nail art looking fresh and beautiful for longer.
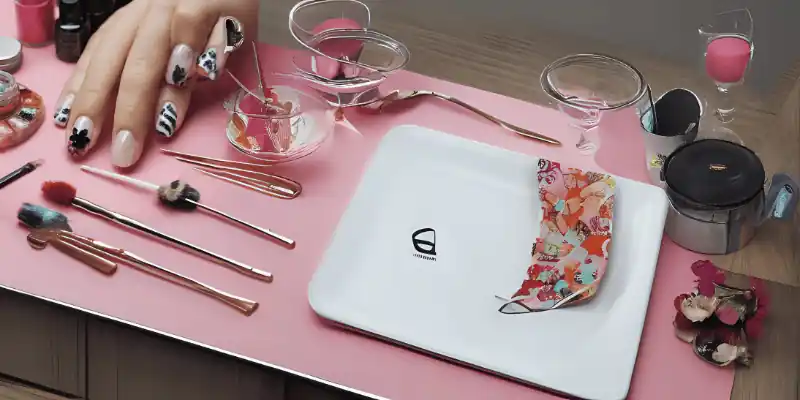
1. Essential Tools and Materials for DIY Nail Art
How I Start My Nail Art Journey at Home
Creating amazing nail art at home is easy with the right tools and materials. These basic items help me design beautiful nails without needing fancy equipment. Let’s see what I need to get started!
Nail Polish: I pick various colors, including base and top coats.
Everyday Tools: I use toothpicks, bobby pins, and tape for simple designs.
Nail File and Buffer: I shape and smooth my nails for a perfect base.
Cotton Pads and Remover: I clean my nails to avoid any mistakes.
Glitter and Stickers: I add extra sparkle and fun to my designs.
Basic Essentials
A good base coat and top coat are important for my nail art. The base coat protects my nails and keeps them healthy, while the top coat makes my designs shiny and lasts longer. I always pick quick-drying ones to finish my nail art faster and enjoy my perfect nails for days!
Choose long-lasting formulas that dry quickly for best results.
Brushes and Applicators
Using the right tools helps me make my nail art neat and beautiful. I don’t need professional tools because these simple items work just as well:
| Right Tools |
|---|
|
These straightforward tools make my DIY Nail Designs for Short Nails look fabulous without spending extra money!
Polish Selection
When I pick nail polish for my DIY Nail Designs for Short Nails, I look for formulas that make the job easier:
- It flows smoothly without leaving streaks.
- It has good opacity, so I don’t need too many coats.
- It dries quickly, saving me time.
- It comes with thin brushes that give me better control.
These little things help me create beautiful nail art quickly and perfectly!
Cleanup Tools
When I work on my DIY Nail Designs for Short Nails, I always keep these items ready for quick and easy cleanup:
- Cotton swabs to fix tiny mistakes.
- Nail polish remover to clean up any smudges.
- A small clean-up brush for neat edges.
- Paper towels or lint-free wipes to keep everything tidy.
These tools help me keep my nail art looking neat and professional!
💡 Key Takeaway: A successful DIY nail art journey begins with investing in essential tools like quality polishes, proper brushes, and cleanup materials.
2. Preparing Your Nails for Art
Before I dive into creating DIY Nail Designs for Short Nails, proper prep is key to getting a professional look. A perfect manicure starts with a clean canvas and the appropriate foundation. Here’s how I get my nails ready:
Clean and Shape
First, I remove any old polish and clean my nails thoroughly. Then, I make them smooth edges and my favorite shape.
Base Application
Next, I apply a base coat to each nail. This step creates a smooth surface and prevents my nails from staining. I dry the nail completely before moving on.
Clear Foundation
If I’m planning intricate designs, I apply a clear coat first. It helps create an extra-smooth surface and ensures my designs stick and last longer.
Quick Pro Tips
- I always work in a well-lit area.
- Resting my elbow on a flat surface keeps my hands steady.
- I make sure my nails are dehydrated between layers.
- I remove any oils from my nail surface to help the polish stick better.
With these simple steps, my nails are ready for beautiful DIY art!
💡 Key Takeaway: Proper nail preparation with a thin base coat and clear foundation is essential for creating long-lasting nail art designs.
3. Basic Nail Art Techniques
Creating stunning DIY Nail Designs for Short Nails doesn’t require professional expertise. I can achieve beautiful results right at home with a few basic techniques and a steady hand. Here’s how I master the essentials:
Master the Basic Strokes
I start by practicing simple strokes on a piece of paper. This helps me develop a steady hand for nail art. I hold my brush at a 45-degree slant to improve control. Light pressure gives me thin lines and more pressure creates thicker ones.
Perfect Your Dotting Technique
Even skilled nail artists begin with dots. I use the head of a bobby pin or a toothpick to make perfect dots. I apply gentle pressure and lift straight up to avoid smudging. Varying the pressure helps me make dots of different sizes.
Learn Layering Methods
Layering is key for creating intricate designs. I always let each layer dry completely before adding the next one. A great trick is to start with light colors and work my way to dark ones. Darker shades cover lighter ones better!
Master Clean-Up Techniques
I keep a small detail brush dipped in nail polish remover to clean up any mistakes around my nails. I follow the pro rule of cleaning as I go instead of waiting until the end, which helps keep my designs neat.
With these techniques, I can create stunning nail art that looks professional and fun!
💡 Key Takeaway: Mastering basic nail art techniques requires practice, patience, and the right tools, but with these fundamental skills, you can create professional-looking designs at home.
4. Simple yet Stunning Designs

Simple yet Stunning Designs for Short Nails
The best part about DIY Nail Designs for Short Nails is how simple ideas can look so stylish. Here are some beginner-friendly designs that are easy to try and make a significant impact:
Minimalist Lines and Stripes
I love starting with simple line designs. I draw straight or diagonal lines on my nails using a thin paintbrush. A single stripe down the middle looks elegant, or I can try crosshatching patterns for something fun. I place a thin line near my cuticle or along the nail edge for a modern look.
Dots and Spots
Dots are easy and look fantastic! I use a toothpick or bobby pin to create dots of different sizes. A cascade of dots from one corner to the other or tiny dots framing my nails works excellently. Using contrasting colors makes the design pop.
Modern French Tips
I give the classic French tip a trendy twist. Thin micro-tips or diagonal angular tips look super stylish. Unexpected color combos, like pastel tips with a metallic line, make the design even more unique.
Geometric Patterns
Triangles are my go-to for geometric designs. I make a triangle at the base of my nail or cover the surface with small, differently angled triangles. Negative space adds a cool, modern vibe to the look.
Half Moon Designs
Half-moon designs are a mix of classy and fabulous. I draw a curved line at the base of my nail and fill the moon shape with a contrasting color. Sometimes, I move the half-moon to a corner or make it asymmetrical for a bold style.
These designs are simple to create and perfect for short nails, giving me a salon-worthy look every time!
💡 Key Takeaway: Simple nail designs can create stunning results through basic techniques like lines, dots, geometric shapes, and creative placement of traditional patterns.
5. Minimalist Lines and Stripes
Starting my nail art journey with simplistic lines and stripes is simple and enjoyable. This simple design elevates short nails, transforming them into elegant beauties.
Creating Perfect Lines
I begin by applying a thin base coat and letting it dry completely. Then, using a striping or detail brush, I draw straight lines across my nails. Horizontal or vertical lines are the easiest for beginners like me. I move my hand smoothly to keep the lines neat and clean.
Abstract Line Designs
I love getting creative with abstract designs! Mixing thick and thin stripes or changing directions, like diagonal or wavy lines, adds a modern twist. The best part? Imperfect lines add charm, so I don’t stress too much about perfection.
Pro Tips for Crisp Lines
- I always wait for each layer to dry thoroughly before drawing more lines.
- I use light, thin strokes instead of pressing hard.
- Starting from the center and working outward helps me stay steady.
- Evenly spacing the lines keeps the design balanced and polished.
Minimalist lines and stripes are a beginner-friendly way to make my DIY Nail Designs for Short Nails look amazing!
💡 Key Takeaway: Minimalist lines and stripes offer an elegant, foolproof way to create stunning nail art designs that work perfectly on short nails.
6. Dots and Spots for Short Nails
Adding playful dots and spots to my nails is one of the most straightforward and fun designs. This easy technique instantly turns short nails into eye-catching works of art with just a few colorful dots!
Creating Perfect Dots
I start by applying a thin base coat and my favorite background color. Once dry, I dip a toothpick or bobby pin into nail polish to make dots. I like to start with larger dots and gradually make smaller ones for a cascading effect. Contrasting colors work best to make the design pop!
Placement Patterns
- Scatter dots randomly for a fun, confetti-like vibe.
- Arrange dots diagonally for a sleek look.
- Create flowers by forming a circle with five dots.
- Go for a classic polka dot pattern with evenly spaced dots.
- Add dots along the nail edge for a unique border design.
Pro Tips for Spotting Success
- I let each layer of dots dry completely before adding more.
- Keeping the dots the same size in each pattern makes the design neat.
- Mixing matte and glossy polishes gives the dots extra dimension and style.
Dots and spots are an easy way to create stunning DIY Nail Designs for Short Nails while having fun with colors and patterns!
💡 Key Takeaway: Master the art of dots and spots by starting with simple patterns and gradually experimenting with more complex designs using basic household items as tools.
7. Modern French Tips for Short Nails
I love giving the classic French manicure a trendy twist with modern variations. These creative updates are perfect for DIY Nail Designs for Short Nails and let me explore bold colours and unique patterns.
Angled Tips
For an edgy look, I paint my French tips at an angle. After applying a base colour, I use my favorite polish to draw a diagonal line across the tip. This asymmetrical style adds flair while keeping the elegant French tip feel.
Micro French
I use micro French tips when I want something subtle and chic. I paint a super-thin line along the very edge of my nail. This minimalist design works beautifully on short nails, giving them a delicate and refined look.
Colorful Tips
Breaking away from white tips is so much fun! At the tips, I use vibrant colors, metallic or even ombre effects. Matching my tips to my outfit or experimenting with contrasting colors makes a bold and stylish statement.
The versatility of modern French tips lets me make them as subtle or dramatic as I like while the application remains easy and beginner-friendly. They’re a perfect mix of timeless and trendy!
💡 Key Takeaway: Modern French tips offer endless possibilities for creativity while maintaining the classic elegance of traditional French manicures, making them perfect for short nails and beginners.
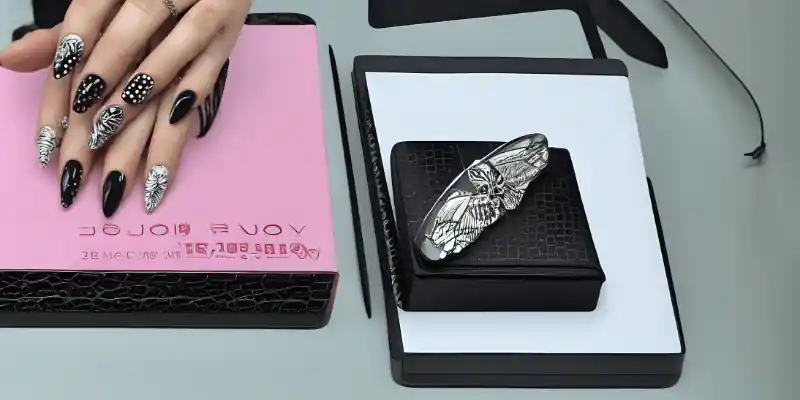
8. Geometric Patterns for Short Nails
Geometric nail art is one of my favorite ways to create stylish DIY Nail Designs for Short Nails. It’s simple, forgiving, and makes my nails stand out with bold, modern designs.
Creating Basic Triangles
I paint a diagonal line across my nail using a thin paintbrush. Then, I connect another line to form a triangle shape. I can fill the triangle with color for a bold look or leave it empty for a trendy negative space effect. Alternating between filled and empty triangles adds a chic touch.
Playing with Shapes
I mix and match geometric shapes like triangles, squares, and rectangles on my nails for a unique style. I outline each shape with thin stripes to keep the design sharp and clean before filling them in. This combination of shapes gives an eclectic, artistic vibe.
Color Blocking with Angles
For a bold statement, I love dividing my nails into sections with angular lines. Painting each section in contrasting colors creates a dynamic look. Metallic shades paired with matte finishes make triangle nail designs even more eye-catching.
With minimal tools and maximum creativity, geometric patterns let me transform my short nails into stylish, artistic masterpieces!
💡 Key Takeaway: Geometric patterns offer endless possibilities for creating sophisticated nail art designs that are surprisingly easy to achieve with basic tools and steady hands.
9. Half Moon Designs for Short Nails
The half-moon shape is one of my favorite DIY Nail Designs for Short Nails when I want something elegant and timeless. It is a simple yet elegant approach to achieve a striking contrast at the base of my nails.
Creating the Perfect Half Moon
I start by applying a thin base coat to protect my nails. After it dries, I use my favorite polish for the primary color. To create the half-moon shape, I follow the natural curve at the base of my nail as a guide. It’s easy and doesn’t need fancy tools!
Color Combinations to Try
Classic: Nude base with a white half-moon
Modern: Black base with metallic gold half-moon
Subtle: Clear base with a pastel half-moon
Bold: Dark polish with a neon half-moon
Pro Tips for Half-Moon Success
- I keep my hands steady by resting my elbow on a flat surface.
- I use thin layers to avoid smudging.
- I always let each layer dry completely before adding details.
- A clear top coat seals the design and makes it last longer.
The half-moon design looks great as an accent nail or across all my fingers for a cohesive style. The best part? Minor imperfections make it more artistic and perfect for beginners like me!
💡 Key Takeaway: The half-moon design offers a sophisticated yet achievable nail art option that can be customized with various color combinations for a professional-looking manicure.
10. Colour Combinations and Effects
The right colours make my DIY nail designs for short nails look amazing. I always match shades that go well together. Metallic and neutral shades give my nails an elegant look, while pastel colours make them soft and pretty. When using bold colours, I add lighter shades to balance the design.
Creating Harmonious Color Schemes
I love adding contrast to my nail designs. I mix light and dark colours to make my nails stand out. A bright accent colour with a neutral base makes my DIY nail designs for short nails playful and stylish.
Layer Colors for Depth
I create depth by layering colours on my nails. I start with a light base coat and add darker shades on top. Metallic gold or silver adds a shiny and unique touch. This layering makes my DIY nail designs for short nails look creative and unique.
Use Seasonal Colors for Inspiration
Spring: I use light pastel shades and fresh greens to create soft and fresh designs.
Summer: I pick bright corals and ocean blues for a vibrant and fun look.
Fall: I love warm, rich burgundies and earthy tones for a cozy feel.
Winter: I choose deep blues and sparkly silvers for a bold and festive style.
Test Colors Before I Commit
I always test colours on a nail wheel before painting my nails. This helps me see how the colours look on me because some shades suit me better than others. This way, my DIY nail designs for short nails always turn out great..
💡 Key Takeaway: Successful nail art relies on thoughtful color combinations and effects that complement each other while reflecting personal style and seasonal trends.
11. Work with Metallic for Glamorous Nails
Start with a Smooth Base:
I use a smooth base coat to make the metallic finish flawless and streak-free.
Apply Thin, Even Strokes
I use thin strokes to keep the polish shiny. Metallic gold looks amazing as an accent with darker shades or for delicate lines.
Avoid Overworking the Polish:
I don’t apply too many strokes, which can ruin the shiny effect.
Pro Tip: I store metallic polishes upright and roll them between my palms to avoid bubbles and keep them smooth.
💡 Key Takeaway: Metallic polishes require careful application in thin layers for optimal shine and professional-looking results.
12. I Love Pastel Perfection for Soft Nail Designs
Perfect for Short Nails:
I choose pastel shades for my DIY nail designs for short nails because they make my nails look clean and elegant.
Best Pastel Combinations:
I mix light pink with mint green for a fresh spring look. Baby blue and pale lavender give a soft style, while neutral tones like beige and light gray look professional and trendy.
Application Tips:
I apply pastel polish in thin coats to avoid streaks. I use 2-3 layers for full coverage and let each layer dry completely to keep my nails smudge-free
💡 Key Takeaway: Pastel shades offer a versatile, sophisticated option for short nails while maintaining a professional appearance.
13. I Try Two-Tone Techniques for Unique Nail Designs
Sophisticated Color Splits:
I use two-tone designs to pair colours that look great together. I start with a light base colour, let it dry, and then carefully add the second shade. My favorite combos are nude with white, pink with gold, or black with silver for a bold look.
Diagonal Division for a Modern Touch:
I split my nails diagonally for a trendy design. I use painter’s tape to create a sharp line between the two colours, giving my DIY nail designs for short nails a cool geometric style.
Tips for Clean Lines:
- I apply thin coats for better control.
- I let the first colour dry thoroughly before adding the second.
- I use a clear top coat to blend the colours smoothly.
- I pick contrasting colours to make the design stand out.
💡 Key Takeaway: Two-toned nail designs combine different colors strategically to create sophisticated, eye-catching manicures that are surprisingly easy to achieve at home.
14. I Add Sparkle with Glitter Application
Dab Glitter for Specific Designs:
I use a thin base coat and dab small amounts of glitter polish onto my nails for precise sparkle. For a marble effect, I swirl the glitter with a toothpick.
Create a Gradient Look:
I apply glitter densely at the nail tip and gradually fade it towards the base. Fine glitter polishes work best for this beautiful gradient effect.
Full Coverage with Layers:
I use 2-3 thin layers of glitter polish for full coverage. I let each layer dry completely to avoid clumps and ensure the sparkle spreads evenly.
These techniques make my DIY nail designs for short nails shiny and fun!
💡 Key Takeaway: Master the art of glitter application by using strategic placement and layering techniques for a professional-looking finish.
15. Use Professional Tips and Tricks for Salon-Worthy Nails
Perfect My Polish Application:
I apply thin, even coats of polish instead of thick ones to avoid bubbles and get smooth coverage. I wait 2-3 minutes between coats for the best results.
Master a Steady Hand:
I rest my elbow on a flat surface to keep my hand steady while painting. For detailed designs, I take breaks and exhale slowly to stay precise.
Create Clean Lines:
I use a small angled brush dipped in nail polish remover to fix mistakes around my cuticles. This makes my DIY nail designs for short nails look professional.
Save Time with Smart Steps:
I complete one step on all nails before moving to the next. For example, I apply base colours to all nails and then add details.”For the best tools to create intricate designs, check out our guide on Professional Nail Art Brushes.”
Practice makes perfect, so I start with simple designs and up to fancy patterns. These tips help me create beautiful DIY nail designs for short nails that look like they came from a salon!
💡 Key Takeaway: Professional nail art techniques focus on precision, patience, and proper application methods to achieve salon-quality results at home.
16. Make My Nail Art Last Longer
Proper Base Preparation:
I start with clean, oil-free nails and apply a thin base coat. I let it dry completely to create a strong foundation that prevents staining and helps my design stick.
Seal My Design:
After finishing my nail art, I apply 2-3 thin layers of a quality top coat. I wait 2-3 minutes between layers to ensure the design is fully protected.
Daily Maintenance Tips:
- I wear gloves while doing dishes or cleaning to protect my nails.
- I apply cuticle oil every day to prevent chipping.
- I avoid hot water right after applying my nail art.
- I quickly touch up any chips to keep my design looking fresh.
Protection Strategies:
I know different designs need different care. For example, glitter designs need more topcoat layers, while simpler designs need gentler maintenance. I always think about my design type to plan the proper protection.
By following these tips, my DIY nail designs for short nails last longer and stay fabulous!
💡 Key Takeaway: Proper preparation, sealing, and daily maintenance are essential for making your nail art last longer and keeping your pretty nails looking fresh.
Conclusion:
Transform your short nails into stunning works of art with these easy DIY nail designs. You can achieve professional-looking results at home with the proper techniques and a little practice. Start with simple designs and gradually challenge yourself with more intricate ones as your confidence grows. Adequate preparation is key, so ensure your nails are clean and oil-free before starting. Be patient and wait for each layer to dry thoroughly to avoid smudges. Finish your designs with a top coat to lock in your art and ensure it lasts longer with a shiny, smooth finish.
Ready to start creating your beautiful DIY nail designs for short nails? Grab your supplies and begin today!
Need more inspiration? Subscribe here for fresh ideas and expert tips!
How long should I wait between nail polish layers when creating DIY nail art?
Wait 2-3 minutes between each layer of polish. For the best results, allow 5 minutes between coats to ensure smooth, smudge-free nail art.
Can I create nail art designs on natural nails that are brittle or prone to breaking?
Yes, you can. Use a strengthening base coat and keep designs minimal with simple patterns like dots or thin lines to protect brittle nails.
What’s the best way to fix mistakes when doing DIY nail art?
Use a small brush dipped in nail polish remover to carefully fix mistakes without ruining the design. For precision, wrap the brush in a tiny piece of cotton or use a toothpick dipped in remover for detailed corrections.
How can I prevent bubbles from forming in my nail polish when creating designs?
Avoid shaking the nail polish bottle; roll it between your palms instead. Apply thin layers rather than thick ones, and avoid fanning your nails to dry them. Store your polish in a cool, dark place to keep it at the right consistency.
Is it necessary to use a UV lamp for DIY nail art to last longer?
No, UV lamps aren’t necessary for regular nail polish art. To make your nail art last longer, use a quality base coat, thin polish layers, and a good top coat. Seal the free edge of your nails with top coat to prevent chipping and extend wear time.
What’s the easiest way to create straight lines without using nail art tools?
Use scotch tape or washi tape as a guide for creating straight lines. Apply the tape when your base color is completely dry, paint over it, and remove the tape immediately while the polish is still wet for crisp, clean lines.
Please Write Your Comments