Are you having a hard time forming a good bond with concrete? You’re not the only one. Is it difficult to bond outdoors or fasten things to walls made of concrete? When taking on a significant DIY task, can applying the wrong bonding method mess up your plans?
Using Liquid Nails on Concrete is a game-changer! This high-performance adhesive simplifies your projects, creating long-lasting bonds that stand the test of time.
- Choose the right Liquid Nails variation based on your project (e.g., heavy-duty or general-purpose formulas).
- For vertical applications, work from the top down for better control.
- Always follow manufacturer guidelines on usage and safety.
Why Use Liquid Nails for Concrete Projects?
Liquid Nails bonds very well. You will find it easy to use. It will make the work look professional and save you time. Be sure to check out our in-depth guide for even more helpful tips!

Don’t settle for subpar results when working with concrete. Any DIYer or home improvement beginner can achieve professional-grade success with the right adhesive and a solid game plan.
Have questions or need advice on your project? Check out more of our articles here to unlock expert tips and tricks!
Key Takeaways:
- Surface preparation is crucial – ensure your concrete surface is clean, dry, and free from debris for optimal adhesion
- Temperature plays a vital role in application and curing – check weather conditions and follow recommended application temperature guidelines
- Choose the right type of Liquid Nails for your specific project, as different materials require different adhesive formulations
- Proper application technique ensures maximum bonding strength – apply in a zigzag pattern for even distribution
- Allow adequate cure time based on environmental conditions and manufacturer recommendations
What are Liquid Nails?
Liquid Nails is a special glue for building. It sticks things strongly. Workers and homemakers like using it. Liquid Nails on Concrete sticks things by a clever formula. It makes a strong hold that lasts in many weathers. It can carry heavy weights.
Types of Liquid Nails for Concrete
When it comes to concrete applications,Liquid Nails on Concrete offers specialised formulations designed specifically for different project needs:
1. Heavy-Duty Construction Adhesive (LN-901)
- Perfect for bonding concrete to various materials
- Provides excellent water resistance
- Ideal for both interior and exterior use
2. Extreme Heavy Duty Construction Adhesive (LN-907)
- Superior strength for demanding projects
- Excellent for concrete-to-concrete bonding
- Works well in extreme temperatures
3. Fuze*It All Surface Construction Adhesive
- Universal bonding solution for concrete
- Bonds in wet, dry, and cold conditions
- Compatible with most building materials
Liquid Nails has many glues that work well for many things and stick well. They work great, as well as doing what they’re supposed to do.
This glue is great because it really sticks things together. Once it’s dry, it can move with the materials, but it still stays too stuck.
💡 Key Takeaway: Liquid Nails on Concrete offers specialised construction adhesive formulations for concrete, providing superior bonding strength and versatility through its advanced polymer technology and application-specific products.
Surface Preparation
For good bonding, prepare the surface properly. It makes Liquid Nails on Concrete stick well and last long. Here are the steps for preparing the concrete surface.
Cleaning the Concrete Surface
Make the cement surface spotless. Get rid of all dirt, dust, and embedded bits. Use a wire brush. For stubborn spots, apply a Special concrete cleaner or a degreaser. Pay special attention to places with paint, oil, or grease. In some cases, you need to use a pressure washer for deeply rooted dirt. Let it dry completely. Drying is significant and should not be hurried.
Checking for Moisture and Temperature
Check concrete moisture; it should be less than 4%. Use a moisture meter. Take the surface temperature with an infrared thermometer; it should be 40-100°f (4-38 C).
Wait for rain-soaked or standing water to dry. Moisture weakens the adhesive bond. Avoid rain forecast within 24 hours after applying.
Generally, ensure that the concrete is truly dry with a minimal moisture content of less than 4% and layer in between temperatures of 40-100band0F. Also, minimum or no movement about rain or standing water on the working surface. This will ensure that once correct considerations have been made, use Liquid Nails on Concrete adhesives without issues.
💡 Key Takeaway: Proper surface preparation, including thorough cleaning and moisture/temperature verification, is crucial for achieving optimal adhesion with Liquid Nails on concrete surfaces.
Application Process
The application process of Liquid Nails on Concrete requires careful attention to detail to ensure a strong bond between wood and concrete surfaces. Let’s explore the step-by-step procedure for achieving optimal results.

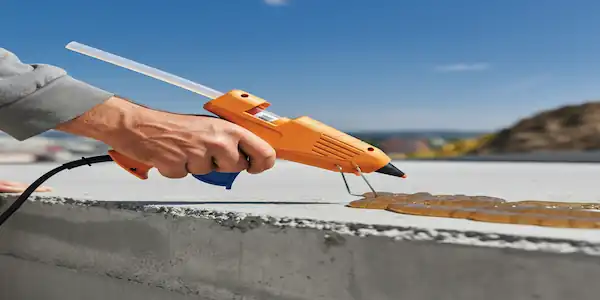
Applying the Adhesive
Load theLiquid Nails on Concrete cartridge into the caulking gun. Apply the adhesive in a zigzag. The bead should be 1/4 inch thick.
For larger areas, use parallel lines of adhesive spaced 6-8 inches apart. Work in sections. Don’t let the adhesive dry before joining surfaces.
Leave a 1/2-inch margin from the edges. This prevents squeeze-out. It ensures a clean look and a strong bond.
Positioning and Securing
Put the wood on the concrete after applying the glue. Press down all over to make contact uniformly. This is how to spread the glue and remove air bubbles that can ruin the bond.
Use braces or weights to keep the pressure on as the glue sets. For vertical designs, consider using temporary fasteners to hold the pieces while they dry.
Don’t move or slide the materials after they make first contact; this will weaken the adhesive. If you need to adjust, lift and glue again.
Watch the setup for the first few hours. Liquid Nails on Concrete grabs well at first, but it takes 24-48 hours to fully cure, depending on conditions.
💡 Key Takeaway: Successful application of Liquid Nails on Concrete requires precise adhesive application in a zigzag pattern, followed by firm positioning and proper securing of materials during the curing period for maximum bond strength.
Curing and Drying
The curing and drying process of Liquid Nails on concrete requires patience and attention to detail. The most important part of a project is the bond. If you know how to do it well, it lasts long and is strong. Factors Affecting Curing Time.
Heat makes Liquid Nails on Concrete dry faster. It dries quickly at 70-90 degrees. Less than 40 degrees delays drying. Humidity slows drying. Dry air speeds up drying.
Thick glue layers take longer to dry. A thin layer dries quicker. You should put down the glue not thicker than a quarter of an inch. Concrete absorbs some moisture from the glue. The more porous the concrete, the slower this happens. Sealed concrete will result in predictable drying times.
Liquid Nails need 1 to 2 days for the initial bond strength but take about 7 days to cure completely, depending on weather conditions. During these 7 days, it is important not to disturb or remove pressure from the bond made.
💡 Key Takeaway: Successful curing of Liquid Nails depends on temperature, humidity, application thickness, and surface porosity, with optimal conditions yielding full-strength bonds within 7 days.
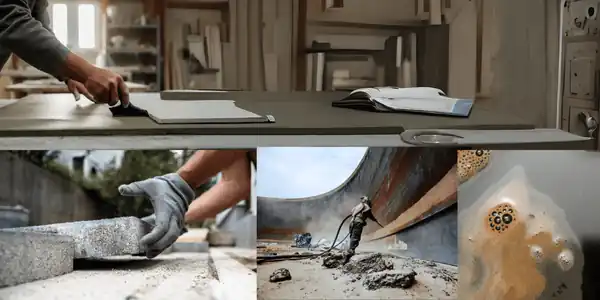
Common Applications
Liquid Nails is the glue that sticks things together. It works for many uses. Pros and DIY-ers love it.
Indoor Projects
Liquid Nails is the top pick for fixing wood on concrete. It’s super strong, so it works great for baseboards, shelves, or wall panels. In basements, it makes wood panels cosy. Homeowners also use it to stick wood to the concrete under doors and around windows. It’s perfect for stair treads on concrete steps, too, staying put through all the foot traffic.
Outdoor Projects
This glue sticks wood to concrete. Use it to put up fences. Add decks on concrete. Also, stick railings or posts on patios. Gardeners attach wood to paths. This glue stands rain and snow. Make wood storage or screens. More jobs used glue to stick wood. Reliable sticky strength for many projects.
💡 Key Takeaway: Liquid Nails’ versatility shines in both indoor and outdoor applications, from mounting baseboards and shelving units indoors to securing fence posts and deck components outdoors, making it essential for wood-to-concrete projects.
Troubleshooting Tips
Common Issues and Solutions
Liquid Nails bonding on concrete has some issues. Let us look into the challenges and solutions.
Poor adhesion happens if surface cleaning and preparation are done incorrectly. You must clean well, and surfaces should be dry. Different applications require special preparations for surfaces.
Bonding gets affected in low or very high temperatures. The best temperature range is between 40-100°F. In cold temperatures, warm Liquid Nails before use.
Apply adhesive in a consistent zigzag pattern while exerting enough force. Allow air bubbles to burst, then clean and reapply adhesive.
The bond may now fail for curing living. Keep surfaces steady as they cure; clamp or support properly. Cure duration ought to be twenty-four hours.
💡 Key Takeaway: Most Liquid Nails bonding issues stem from improper surface preparation, temperature conditions, or the curing process. Following correct application techniques and maintaining optimal conditions ensures successful adhesion.
Conclusion:
If you use Liquid Nails on the concrete, it is not as hard as it appears. The adhesive is durable; hence, it is suitable for both DIY and construction.
- Prepare the Surface: Thoroughly clean the concrete to remove dirt, grease, and debris for optimal adhesion. Ensure the surface is dry before applying the adhesive.
- Choose the Right Adhesive: Not all Liquid Nails products are meant for concrete. Choose a label for the purpose that you need.
- Apply Correctly: Put a line of glue that twists on one side only for a strong bond.
- Handle Temperature Conditions: Work under the guidelines of product temperature.
- Allow Time to Cure: Patience is key! As specified in the product directions, give the adhesive adequate curing time to ensure durability.
There are lots of things that you can do with Liquid Nails once you learn the different steps. You need to know what exactly you want to do and then follow the rules to get good results each time.
For similar expert tips to enhance your DIY and construction skills, visit our guide to fall projects at The Everygirls’ Guide to Fall Chrome Nails. Whether you’re perfecting concrete bonds or exploring trendy home decor ideas, you’ll find inspiration here.
Be confident in your concrete bonding projects! Apply these steps today and transform your materials into lasting, durable results with Liquid Nails.
FAQs:
Can Liquid Nails be used on wet concrete surfaces?
Don’t use Liquid Nails on wet surfaces. Moisture affects adhesive grip. Wait 24 hours after wetness for best results.
What is the temperature range for applying Liquid Nails on concrete?
Use Liquid Nails when it’s between 40°F and 100°F (4°C to 38°C). If it’s too cold or hot, the glue might not stick well or take too long to dry.
How long does it take for Liquid Nails to fully cure on concrete?
Liquid Nails can take 24 to 48 hours to cure on concrete, but it could take up to 7 days to achieve full strength. Drying time also depends on humidity and temperature.
Can Liquid Nails be removed from concrete if needed?
Liquid Nails can stick well. But you can take it off with a putty knife or chisel. Chemicals can also help. Be careful. It might ruin concrete.
Is Liquid Nails waterproof when used on outdoor concrete projects?
Most Liquid Nails products for concrete work well outside in rain and snow. But, look for outdoor acrylic or polyurethane glue for the best results.
How much weight can Liquid Nails support when bonding to concrete?
Some Liquid Nails glue can hold 25-50lbs per inch. The heavy stuff needs special glue.
I’m the author of The Every Girls and a beauty enthusiast, sharing expert tips on nails, fashion, trends, and relationships—making style and self-care fun & effortless! specializing in breaking down complex topics into easy-to-understand ideas. As an eBay and Amazon expert, I use my knowledge to guide businesses toward success inexpert in competitive.
My mission is to inspire, inform, and provide valuable insights to my audience, helping them confidently navigate their journeys.